Noridic Delight Instructions
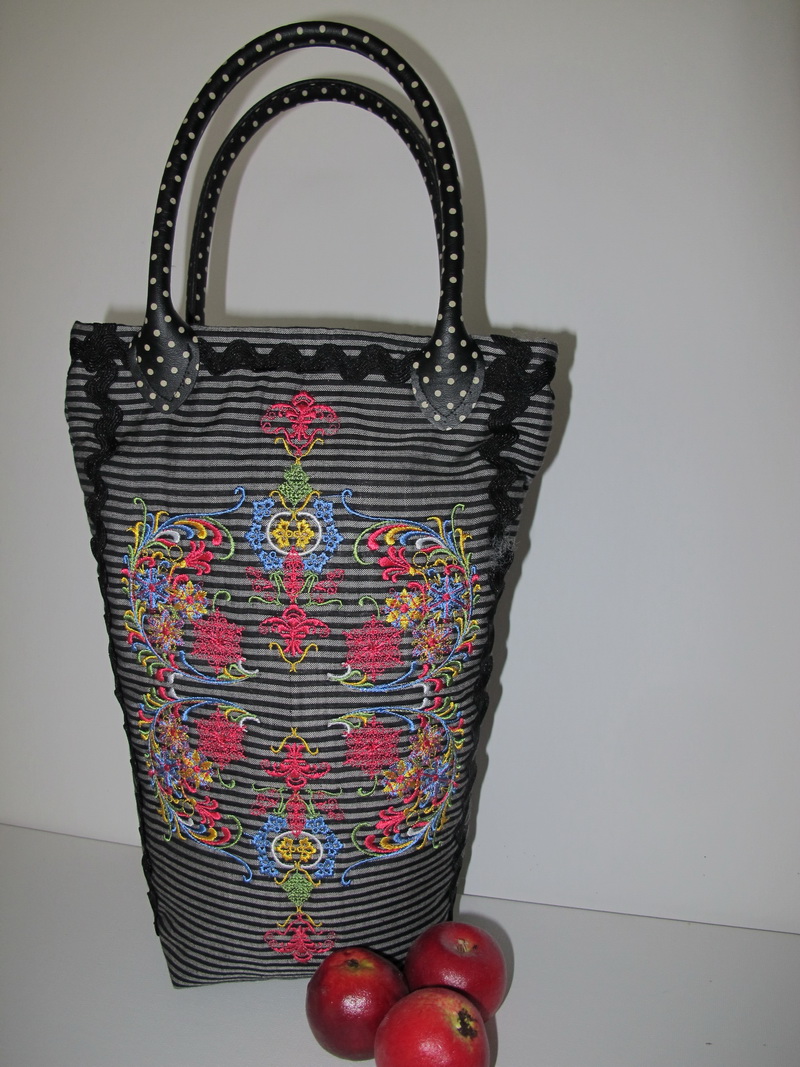
Size of Bag is:
30 length x 22 width cm
Or
12 length x 8 ½ width inches
What you will need:
- 1 meter or 1 yard of black and grey stripped cotton fabric
- 1 meter or 1 yard of thin wadding
- Tear Away or Stitch and Tear stabilizer
- 2 bag handles 38 cm or 15 inches in length
- 3 meters or 3 yards 1.5cm wide Black ric rac
- 1 meter or 1 yard of lining
- Metal magnetic clasp
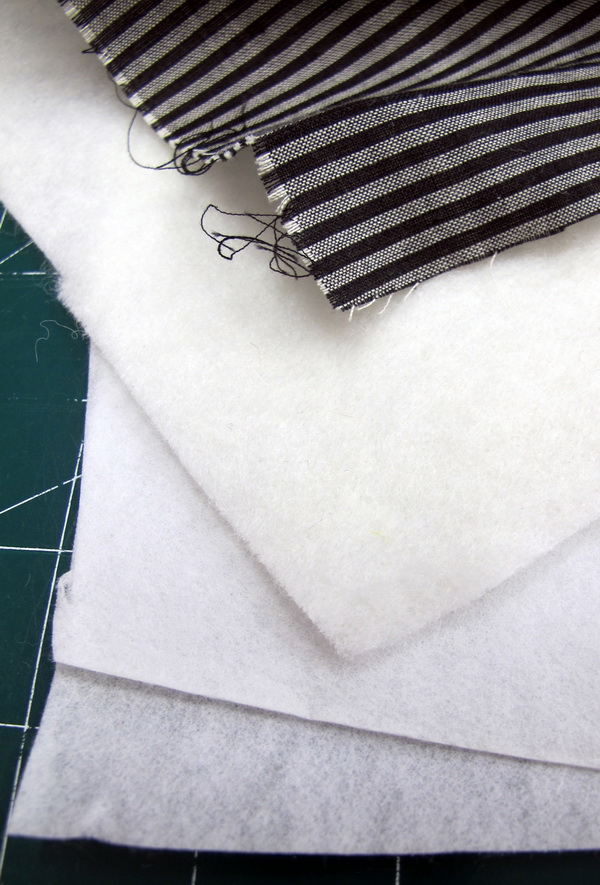
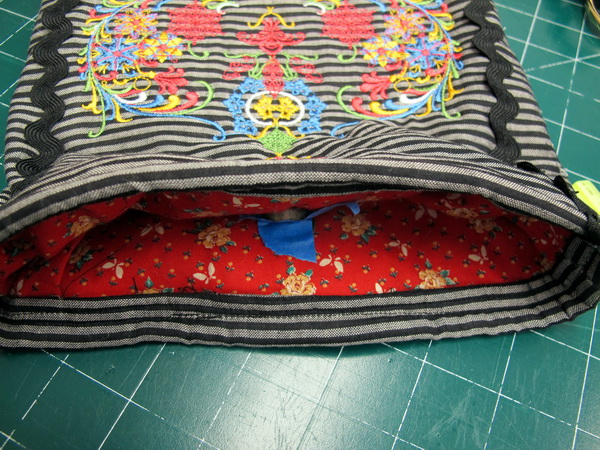
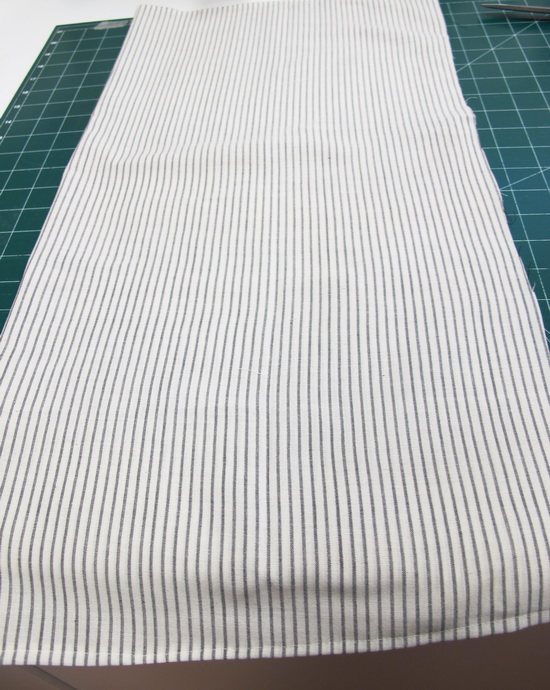
The photo above showing you
- 2 layers of stitch and tear stabilizer
- Thin wadding
- Black and grey stripped cotton fabric
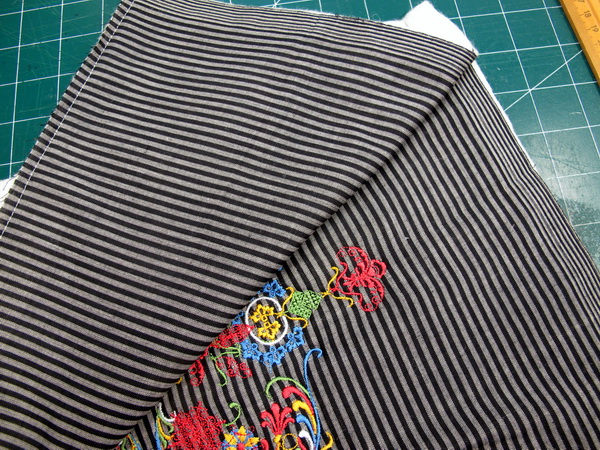
1. Stitch out “Nordic Delight_01” then mirror in either your sewing machine or software “Nordic Delight_01”
2. Cut the fabric for the top of the bag leaving 10cm or 4 inches from the top of the design and from the base 8cm or 3 inches
3. Cut fabric for the back the same length and width as the front of the bag
4. At this stage I recommend you also cut the lining for the bag
5. Add the black ric rac to either side of your design
6. Stitch the front, back and side seams together
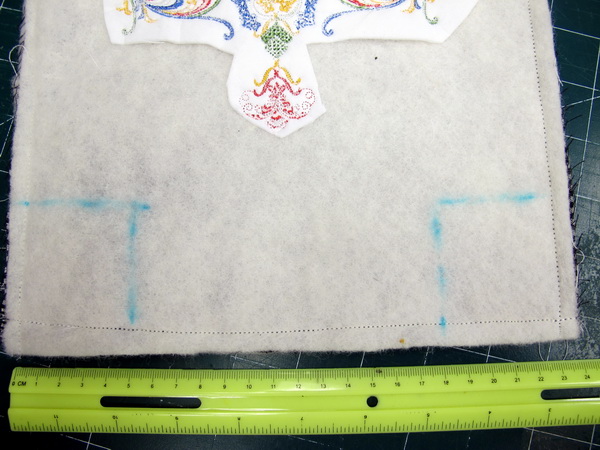
7. For the front of the bag measure 5 cm or 2 inches from the stitched seam as you can see in the photo above
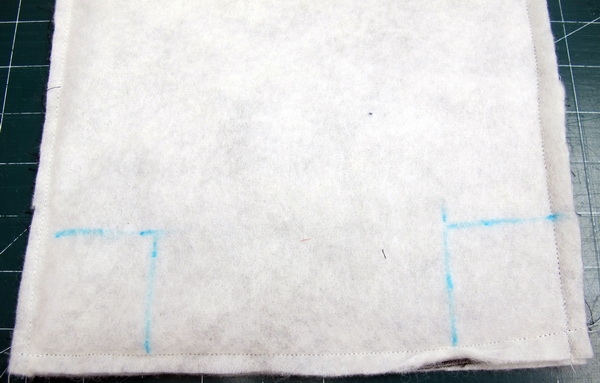
For the Back of the bag measure 5 cm or 2 inches from the stitched seam as you can see in the photo above
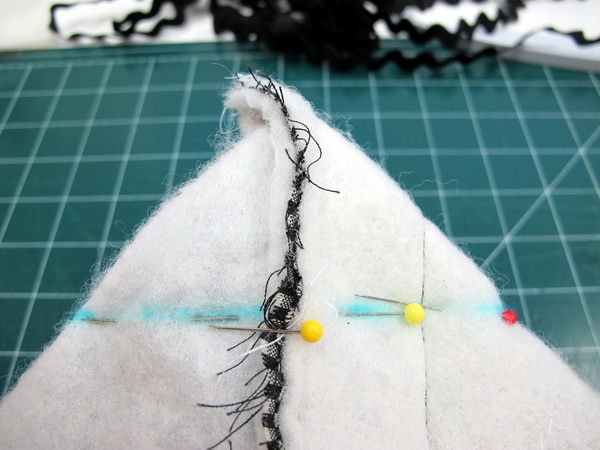
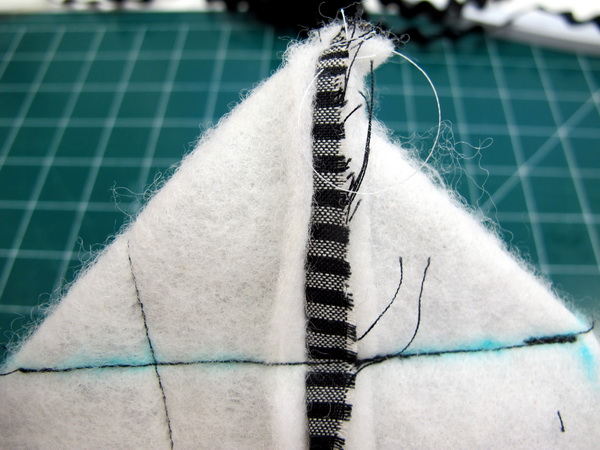
With the sewn fabric still right sides together, using both hands, pinch and pull apart the corner. While you keep pulling, the fabric will begin to make a little peak with the corner point at the top and the seam lines running down the middle of the front and the back. Match these side and bottom seams. Place a pin in the seams to hold them together. It is very important that you exactly match the seams; that is what will make the lines of your finished bag look great.
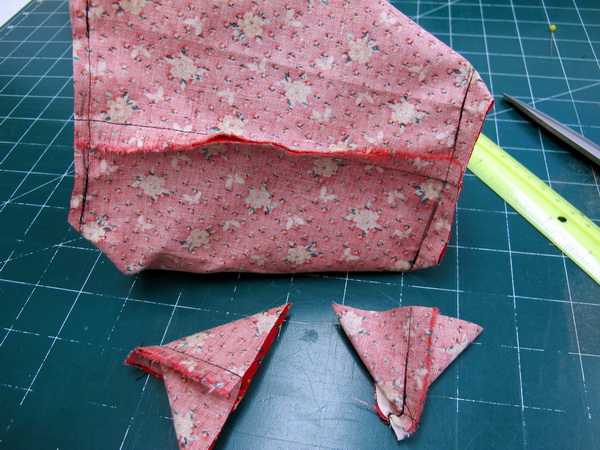
10. Sew across the peak on the drawn line. Be sure to backstitch at the beginning and end of the seam.
11. Trim away the peaks

12. Repeat for the lining the numbers from 7 through to 8
13. Insert the Metal magnetic clasp into your lining
14. So as the metal clasp do not clasp together I put painters tape over each of the clasps, this makes sewing the top of the bag so much easier
15. Insert the lining of the bag into the black and grey stripped bag
16. At the top of the bag fold the black and grey fabric down to make a small hem and then iron, once again fold over the fabric lining and re iron
17. Stitch the ironed fold that is over the lining down
18. To cover the stitching at the top of the bag I stitched the black ric rac, which also gives the bag a nice finish
19. Stitch the bag handles onto your bag
Country Chic Instructions
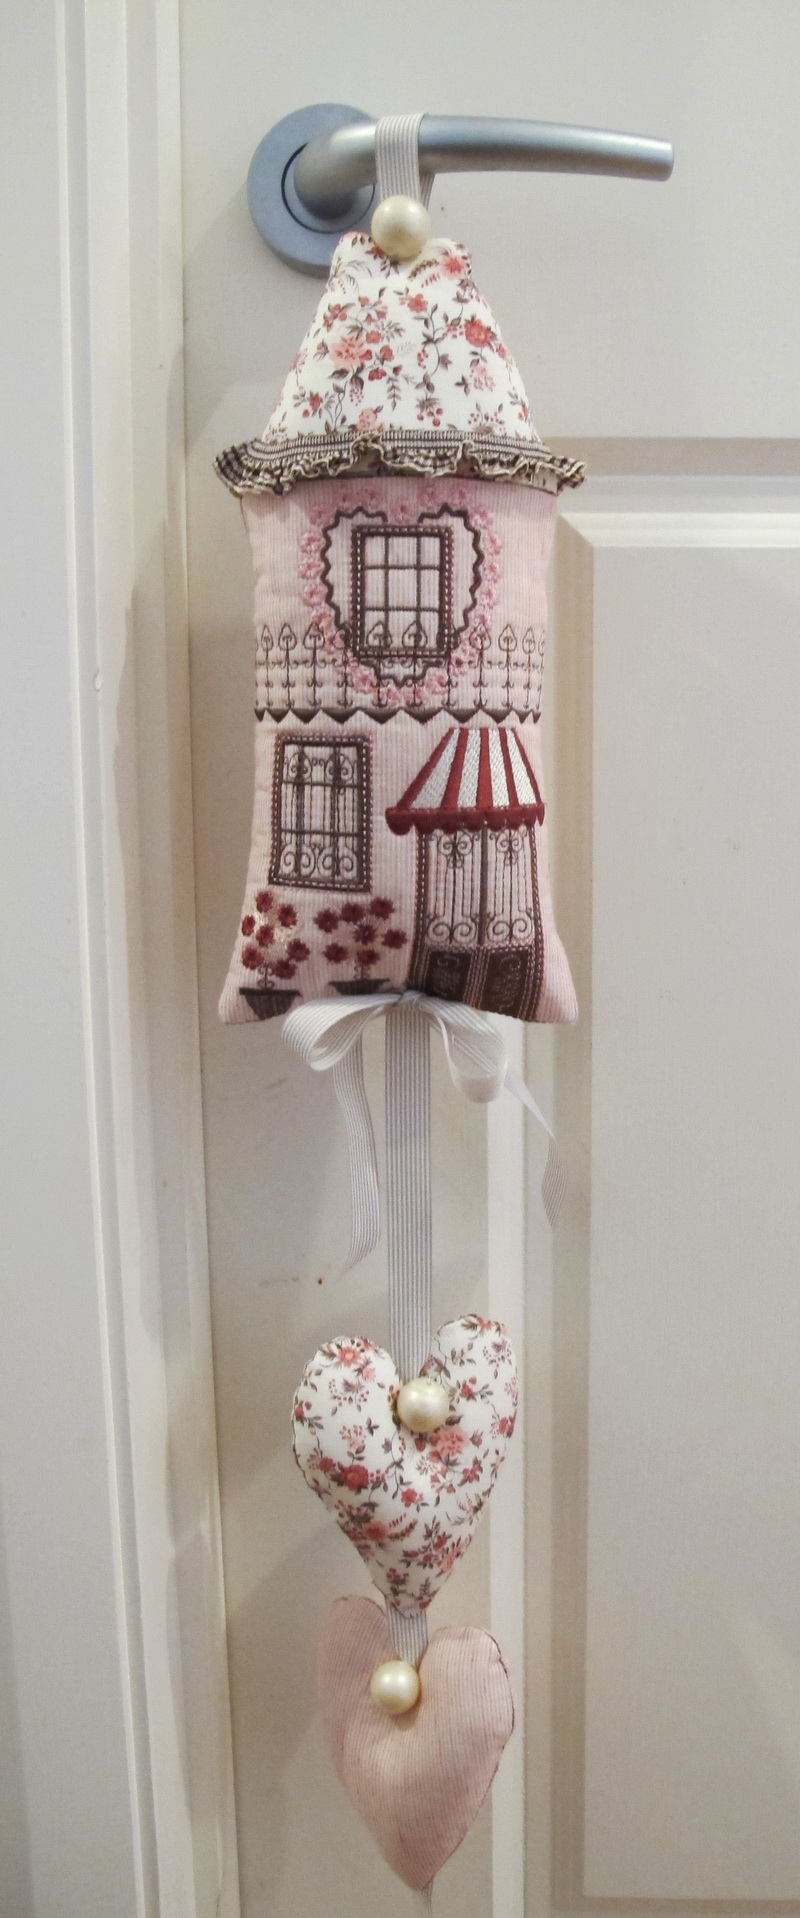
Country Chic Door Hanger
What you need to make the door hanger
- ½ meter or ½ yard of plain fabric
- ½ meter or ½ yard of floral fabric
- 2 meters or 2 yards of ribbon
- 3 large beads
- Bag of stuffing
- Stabilizer Stitch and Tear
- Thin wadding
To stabilize the fabric I used the following
- Thin wadding and below the wadding I put the Stitch and Tear
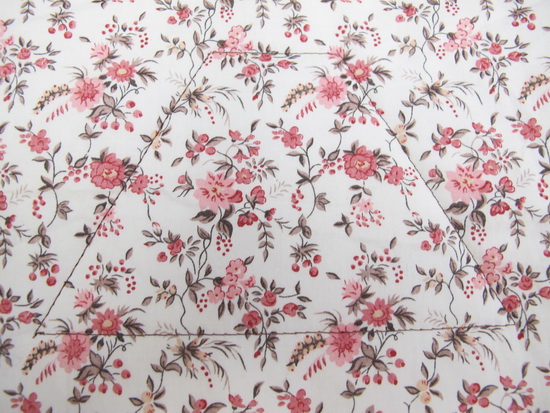
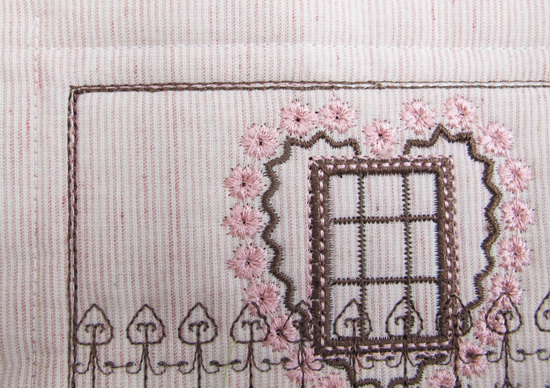
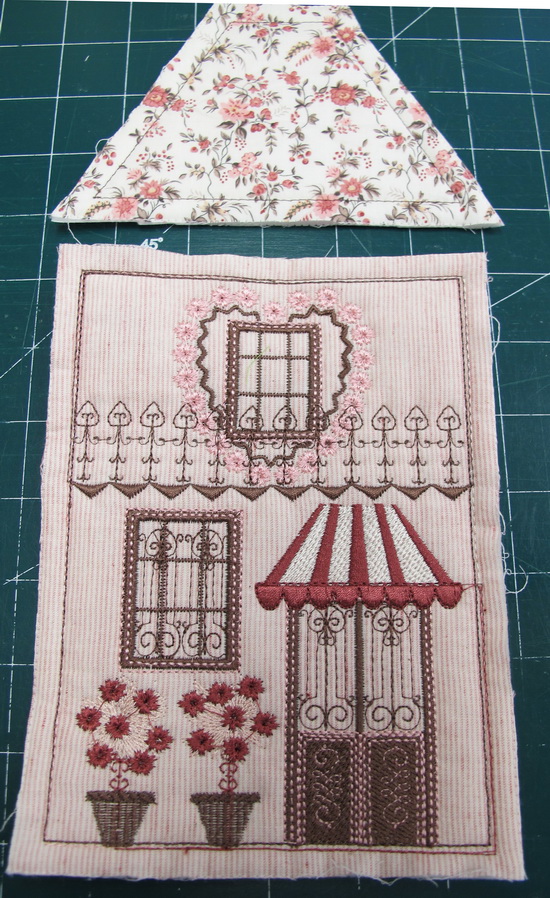
Stitch out Country Chic_08 I used a pretty Liberty cotton fabric for the roof
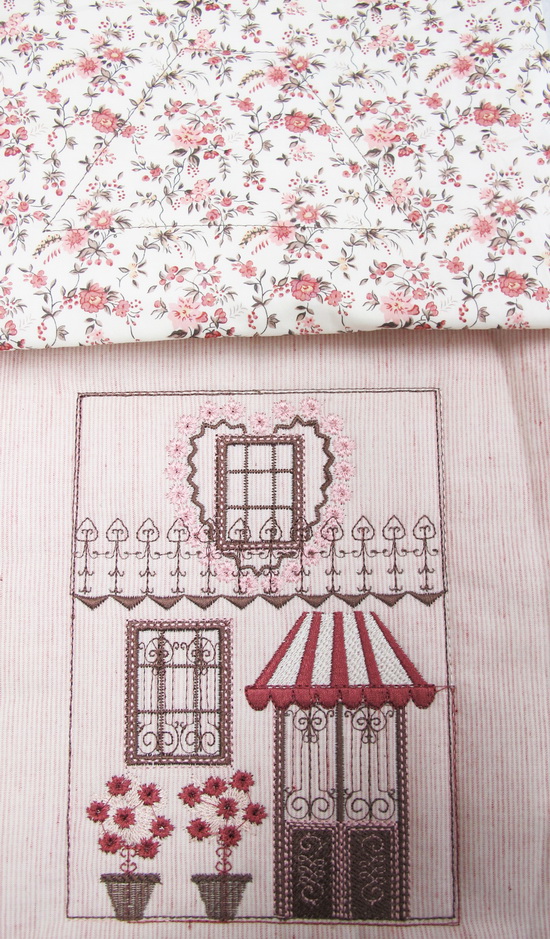
Stitch out Country Chic_03 I used a fine cotton with a faded dark pink stripe fabric
Stitch in a straight stitch around the house and roof panel, this will mark the seam for you to cut out
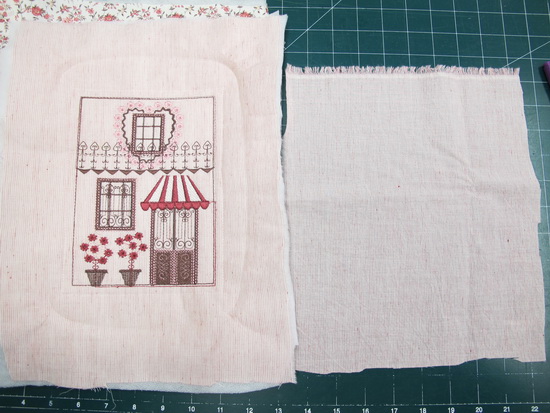
Lay under the roof and house panel the fabric you would like for the backing.
Cut around the house, roof panel and backing fabric where you had straight stitched
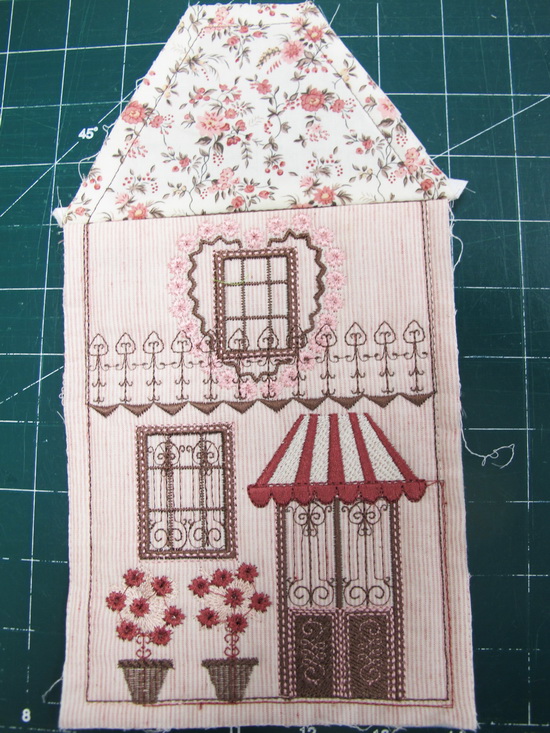
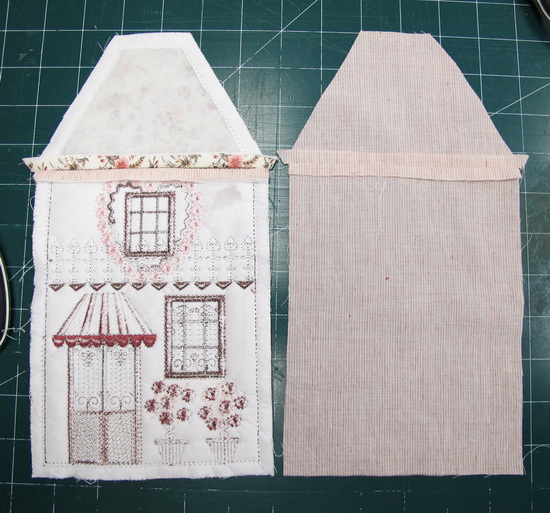
Stitch the roof and house together then iron the seams flat
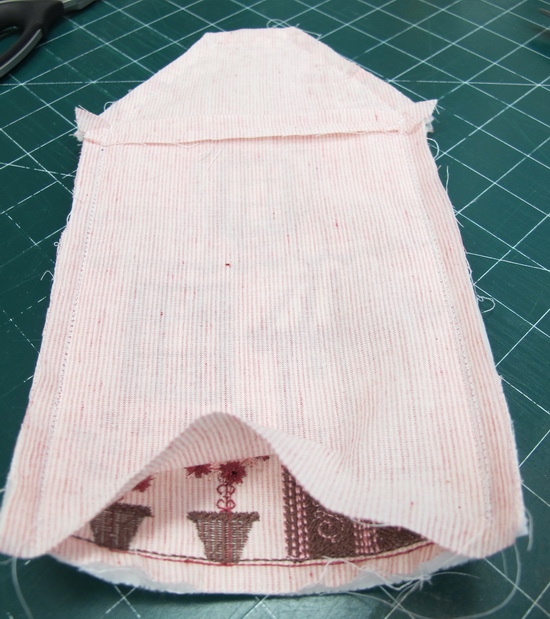
Stitch the house to the back leaving the base for stuffing
Fill the house with stuffing
Stitch the base, I just hand stitched
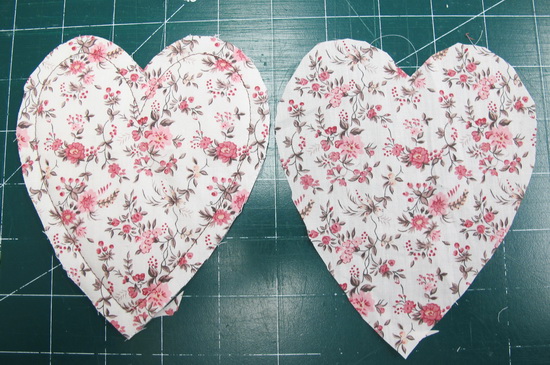
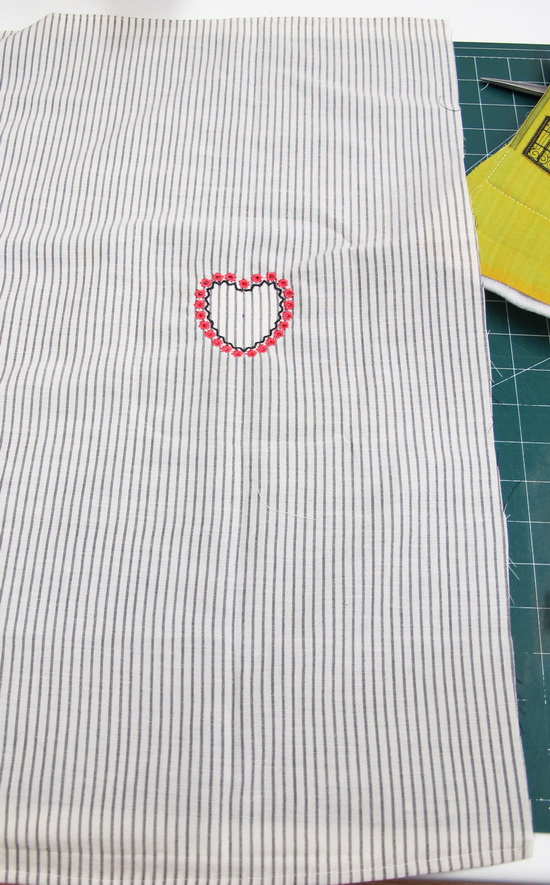
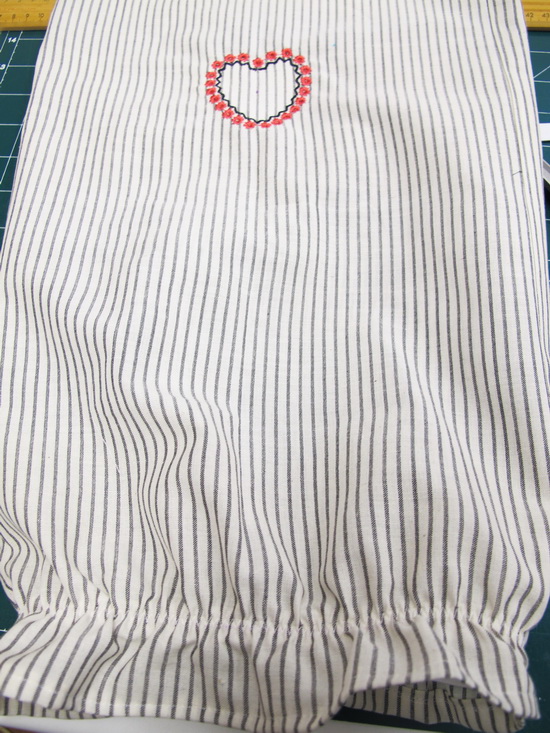
Stitch out Country Chic_05
Straight stitch around the heart for you to follow the seam
Using the same fabric for the front and back cut out the heart following your stitches for the seam
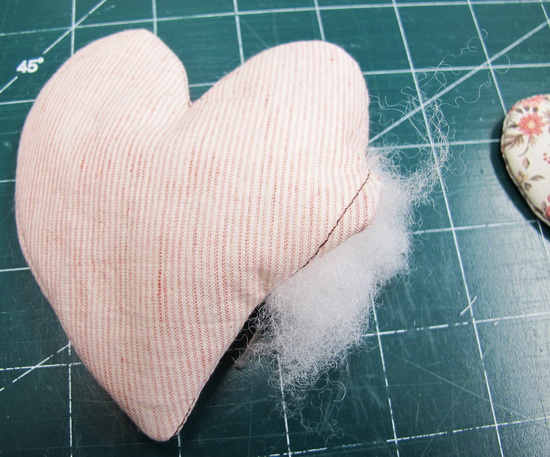
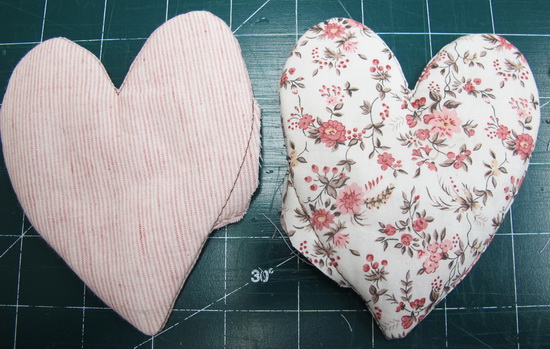
Stitch the hearts together leaving enough room for you to stuff the hearts
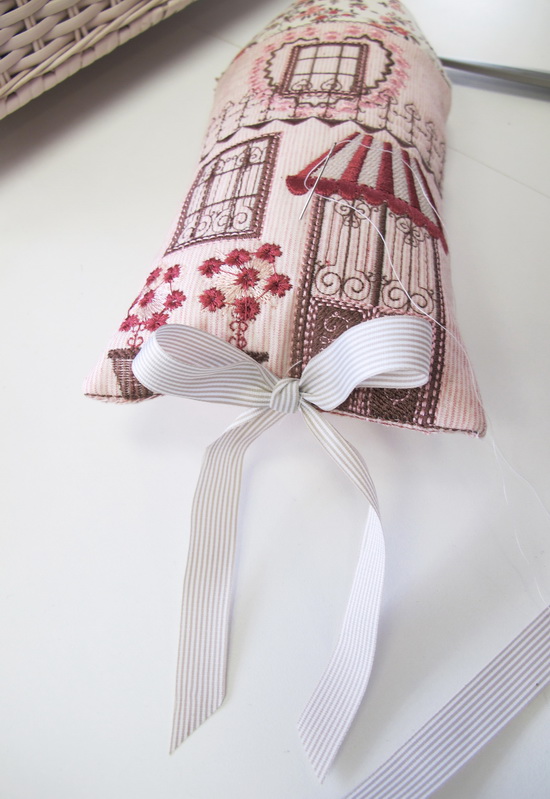
Make a bow and stitch the bow to the base of the house
I stitched on these large pearl beads, these are old pearl beads from a necklace my Mother-in-Law once owned, you can use whatever you have around the house or try searching dollar shops or Vinnies or one of those places near you
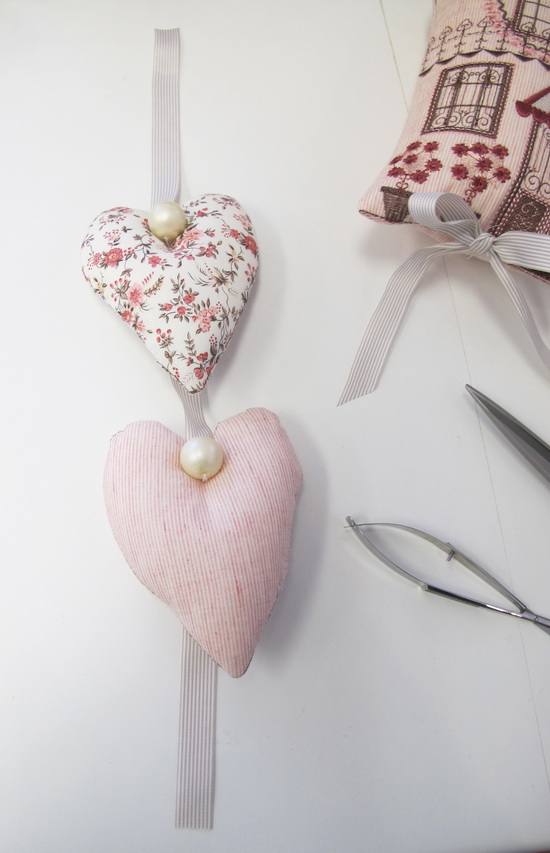
Using the same ribbon as the bow at the base of the house and hand stitch the hearts on the ribbon
Stitch the ribbon that has the hearts to the base of the house
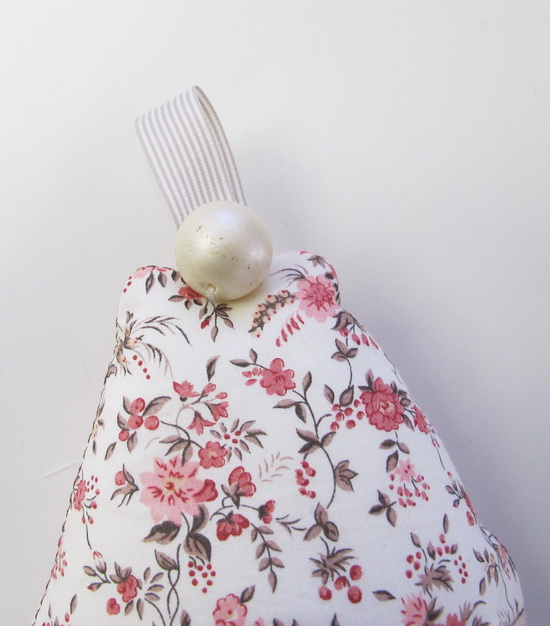
Stitch a loop using the same ribbon and a bead onto the top of the roof
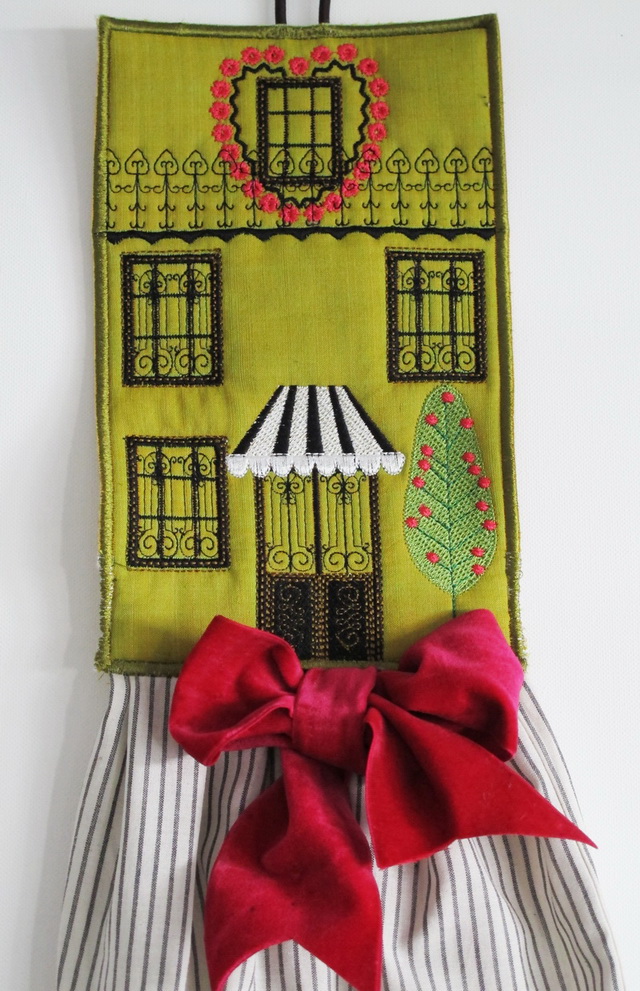
Country Chic Bag Holder
What you need to make the plastic bag holder
- ½ meter or ½ yard of cotton fabric for the house panel
- ½ meter or ½ yard of striped fabric
- Elastic 36 cm or 14 inches in length
- Ribbon for a bow
To stabilize the fabric I used the following
- Thin wadding and below the wadding I put the Stitch and Tear
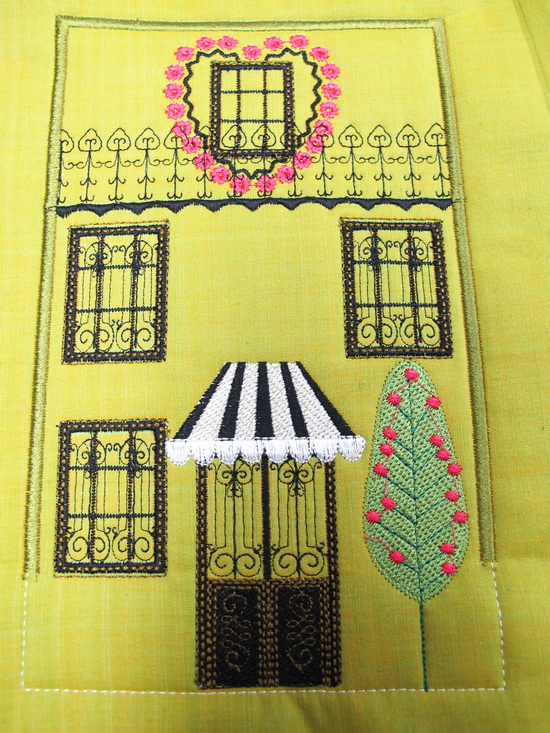
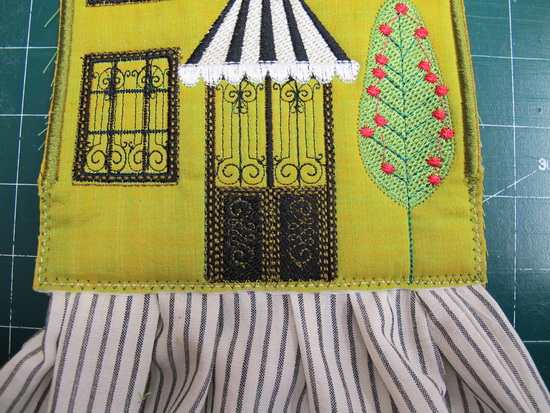
Stitch out either Country Chic_01 or Country Chic_09 depending on the size of the hoop you have
Cut as close as you can to the satin stitch border, once you have cut all around the satin stitching with your scissors leave enough of the fabric where the straight stitches are so at a later time you can stitch a satin stitch.
Cut the striped fabric 65cm or 14 inches wide by 65cm or 14 inches long
hem both the top and bottom of the striped fabric
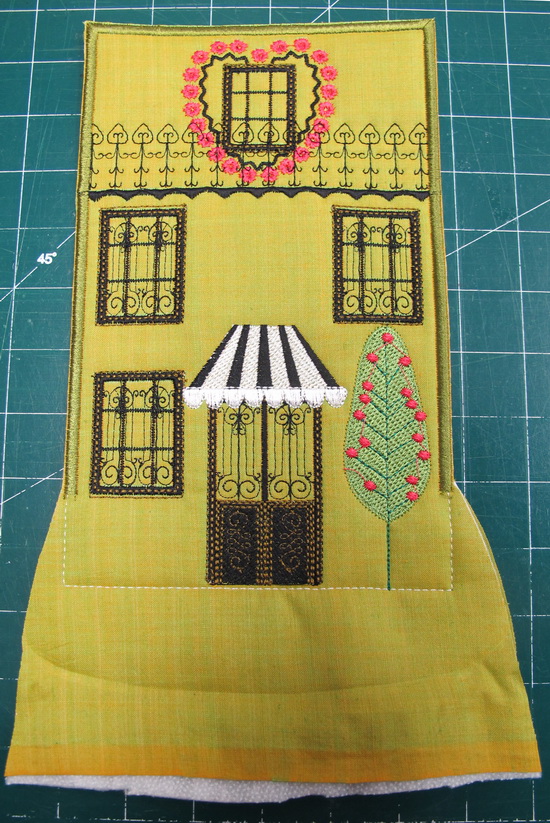
Fold the fabric in half-length ways, to the right of your fold find the centre and Stitch Country Chic_05 on the striped fabric
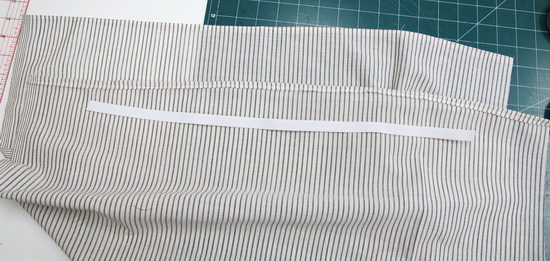
Cut elastic 36 cm or 14 inches long and 1 cm or 1 inch wide, I really do not think that it would matter how wide the elastic is

Using a zigzag stitch sew your elastic close to the bottom of the fabric
Stitch the side of the striped fabric and then iron the seams
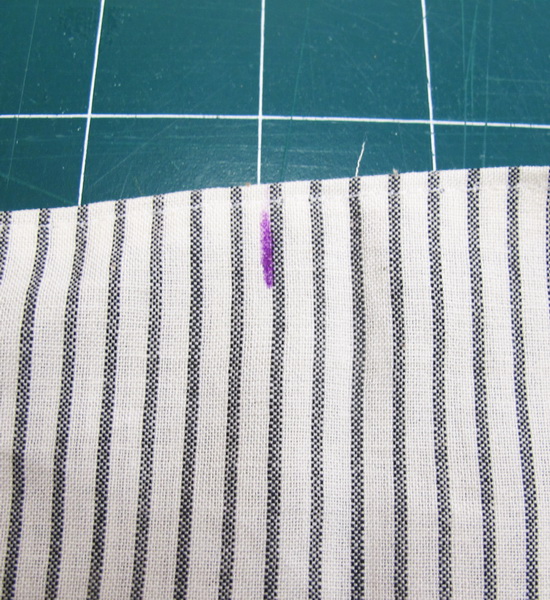
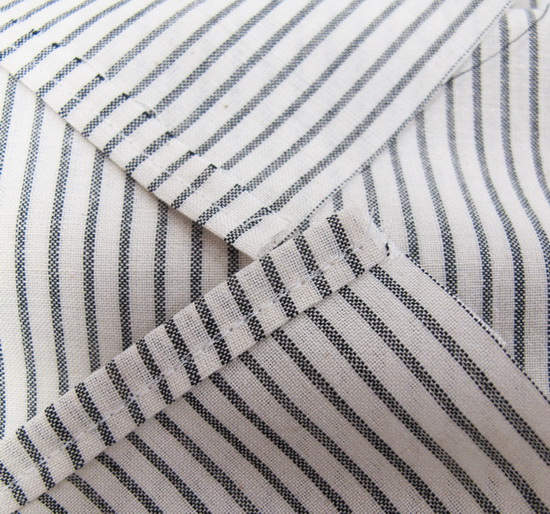
At the top on both sides of the striped fabric find the centre
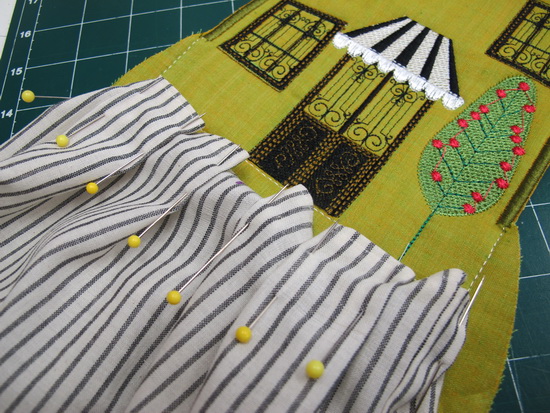
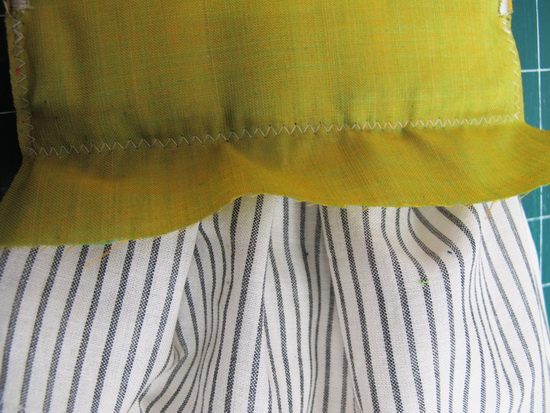
You can either pleat the striped fabric or gather which ever you prefer to be the same size as the green panel
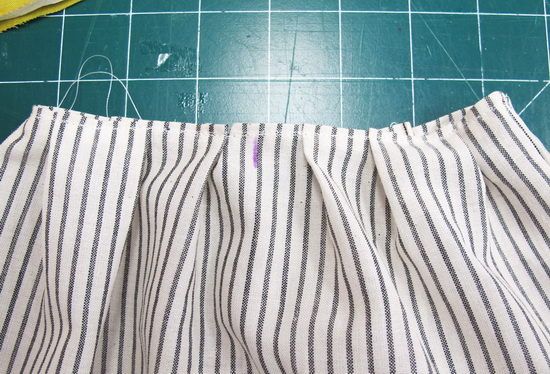
Stitch the gathers or pleats down
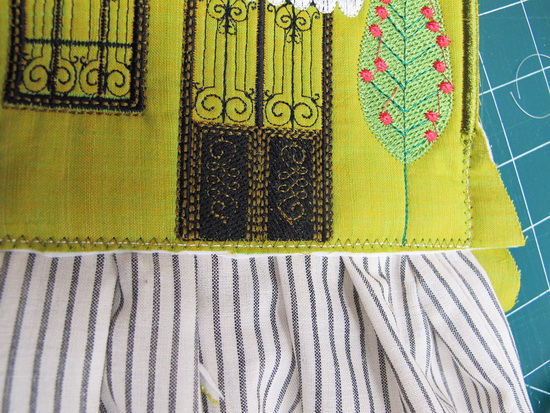
Front panel
Back panel
Insert into the green panel the striped fabric and zigzag stitch the striped fabric to the green panel
Cut away the excess fabric from the zigzag stitches, satin stitch over the zigzag stitches, I satin stitched a couple of times
I had a velvet ribbon similar colour to the flowers and made a bow and hand stitched the bow in the centre, I feel this just gives the work a lovely finished look
Down to Earth Instructions
Down to Earth Wall Hanging
What you will need:
- 4 metres of fabric, I always purchase more than I need, just in case. This includes the backing fabric you need to stitch all the designs down.
- 4 metres of light or medium weight wadding, I used light.
- 1.5 metres of red and white gingham fabric
- Tear away
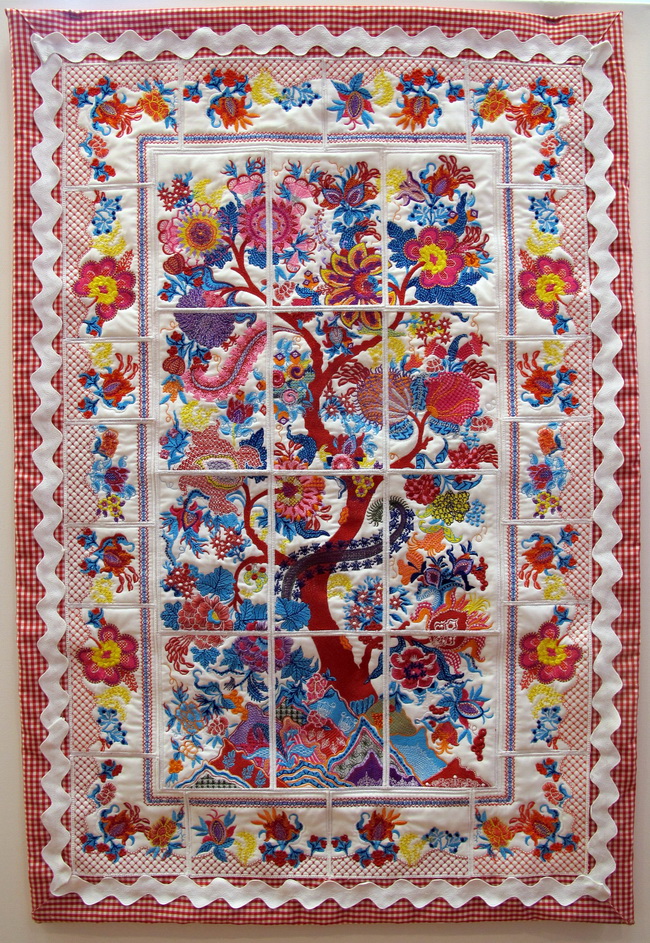
The following photo is a guide to the numbering system for you to follow to make the quilt
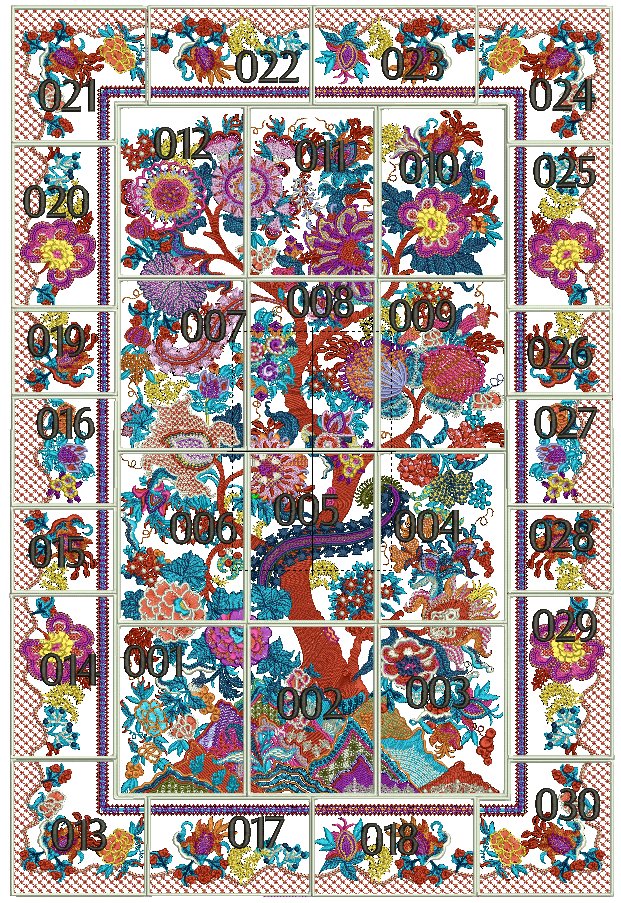
- For each of the designs I used a light weight wadding and a tear away
- Stitch out the following “Down to Earth” designs 001 to 030 to make the quilt
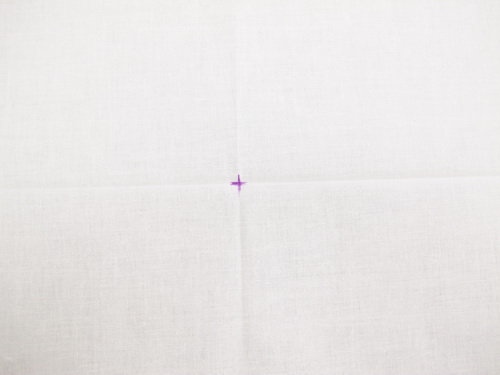
- Find the centre of your backing fabric and mark the fabric as seen in the photograph
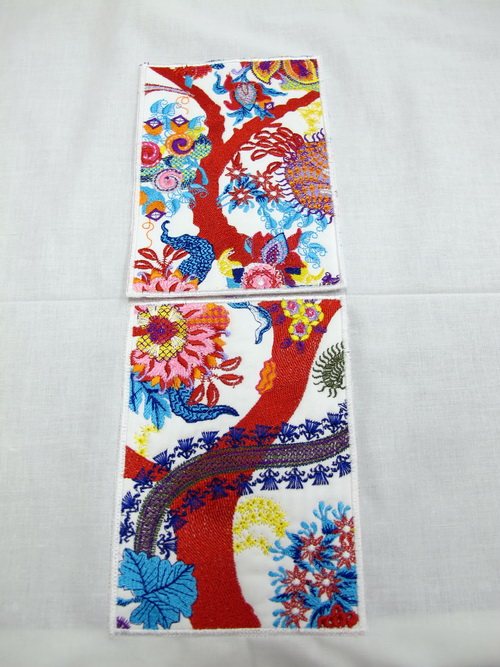
- Lightly glue, I used a hot glue gun and glue the design 005 down where you marked your centre and then zig zag stitch the design down to your background fabric
- Above 005 lightly glue 008 down and zig zag stitch the design down to your background fabric
- Keep going with lightly gluing the design and then zig zag stitching all the designs down
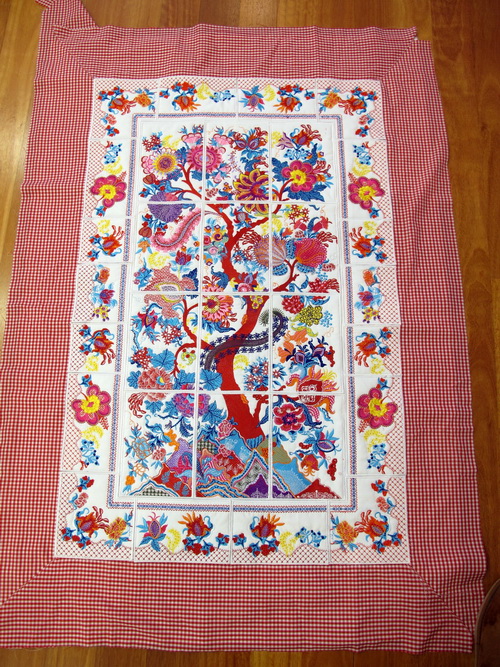
- You can then finish the quilt any way that would best suit you. I would have used the red and white gingham fabric as the background fabric but I did not have enough of the fabric so I put the gingham fabric on the outside of the quilt.
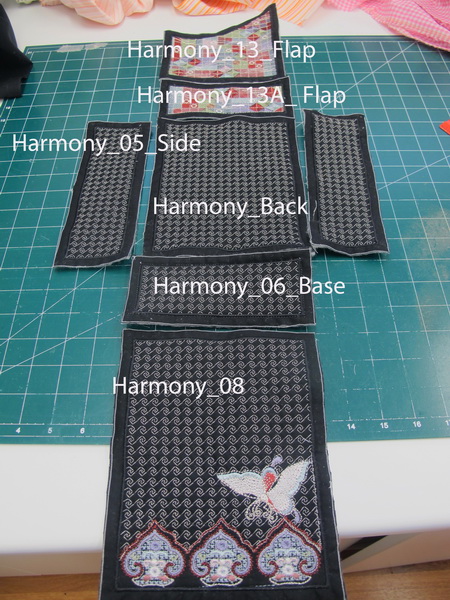
Harmony Instructions
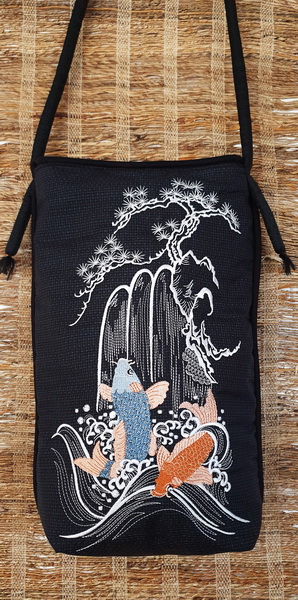
Harmony Black Bag
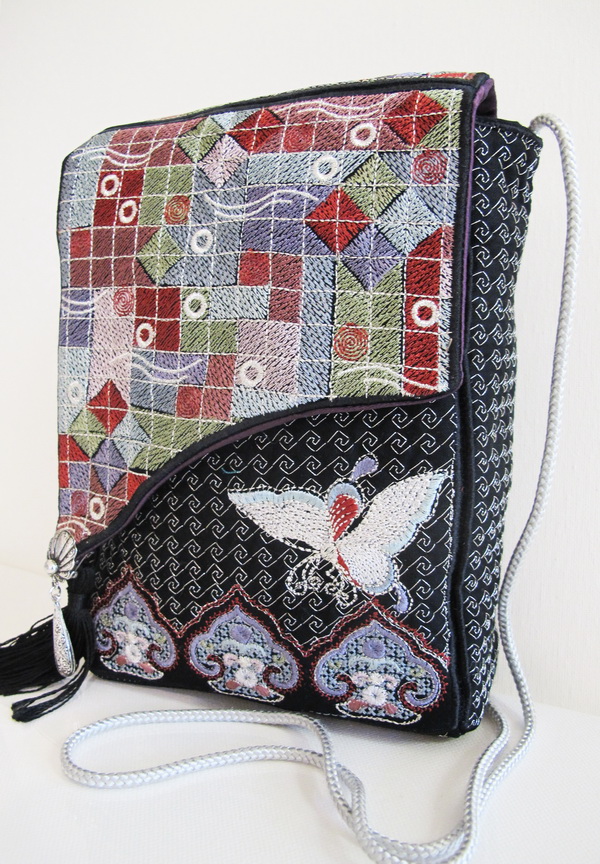
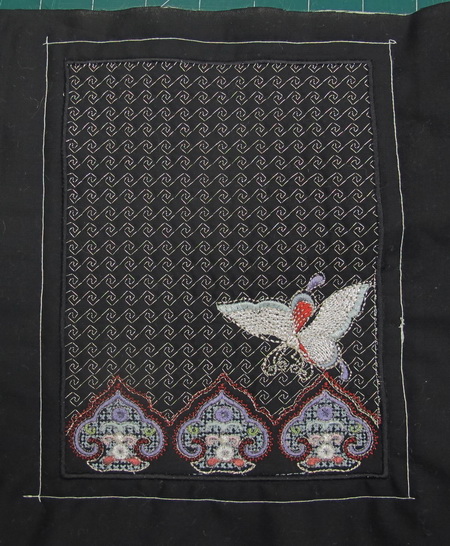
Stitch out Harmony_08 This is the front of the bag
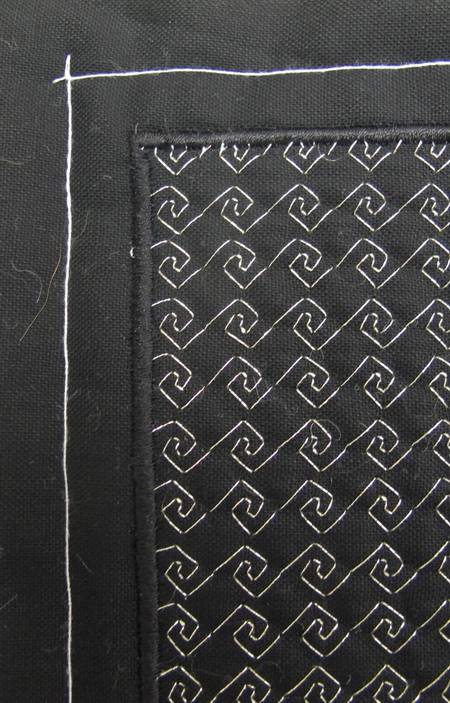
Stitch around each of the panels for your seam allowance, I find this is an easy way of marking the seam allowance especially on a dark fabric
Stitch out the following
- Harmony_04_Back
- Harmony_05_Side, stitch two
- Harmony_06_Base
- Harmony_13A_Flap
- Harmony_13_Flap
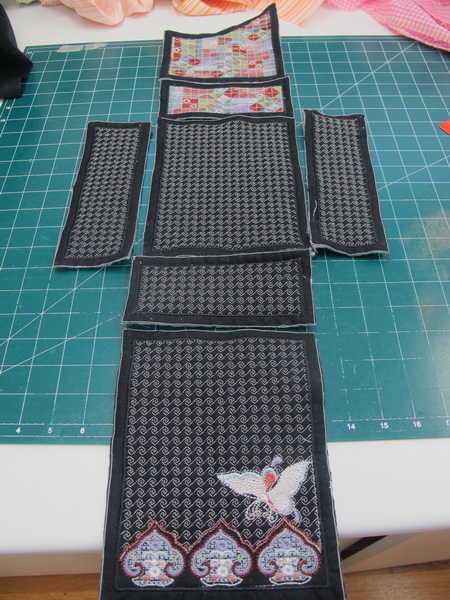
Cut out each panel where you have marked for seam allowance
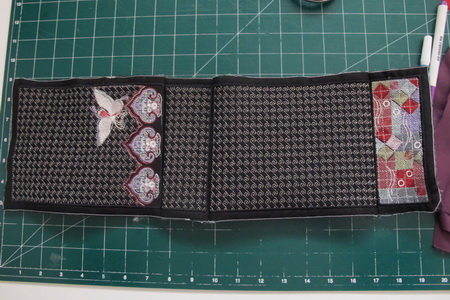
Using your panels that you have just cut for the lining of the bag
I like to lay out each piece of the bag to understand how I am going to stitch the bag together
Stitch the front to the base
Stitch the base to the back
Stitch the back to the design Harmony_03A_Flap
Stitch the sides to the front
Once you have stitched both sides to the front and back panels, stitch the design Harmony_13A_Flap to the back of the bag.

Stitch the design Harmony_13_Flap to the Harmony_13A_Flap
Stitch the following lining together
- Front
- Back
- The two sides
- Base
At the top of the lining stitch in your seam allowance
Stitch the following lining together
Harmony flap front and Harmony flap rectangle

Stitch the two lining flaps to the two black flaps
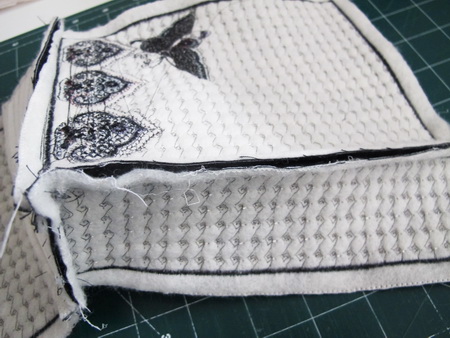
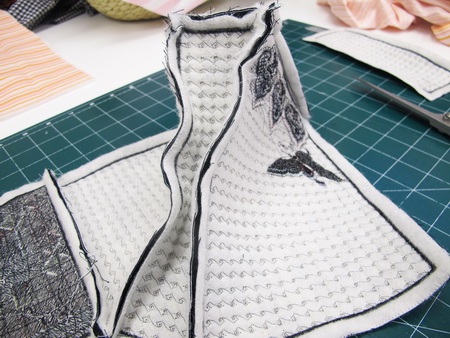
Cut away any excess fabric and snip using sharp scissors on the curve as you can see in the photograph
Glue and stitch in your bag strap to the side panels
Insert your magnetic studs to the flap and front panels (I forgot to do this part)
Pin the front and side lining to your bag
Stitch the front and side lining together, leaving the back of the lining
Hand stitch the rectangle flap to the back of the lining
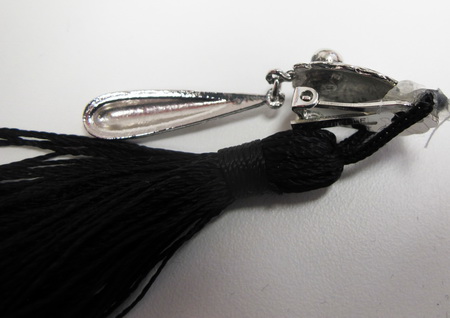
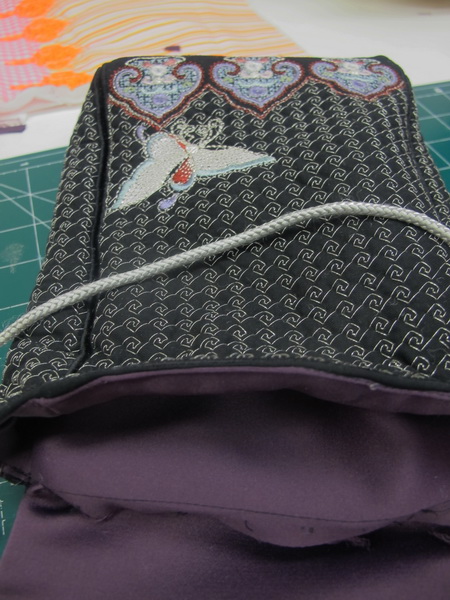
I kept many of mothers clip on earrings or if you do not have any you can purchase from the two dollar shops , stitch the clip on earring to a tassel and hand sew on the pointed front flap
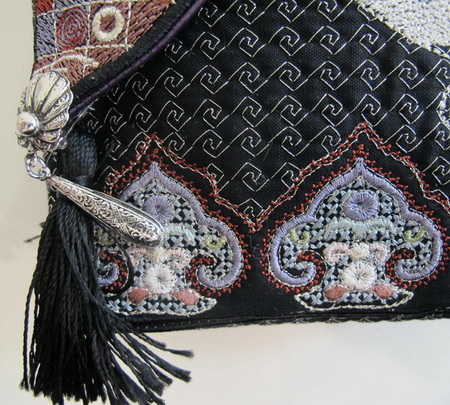
Earring and tassel stitched to the pointed end of the front flap
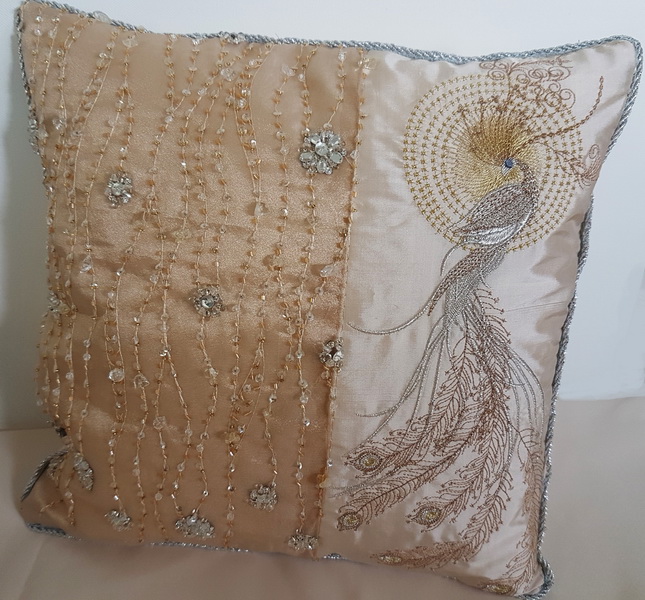
Harmony Aqua Crush
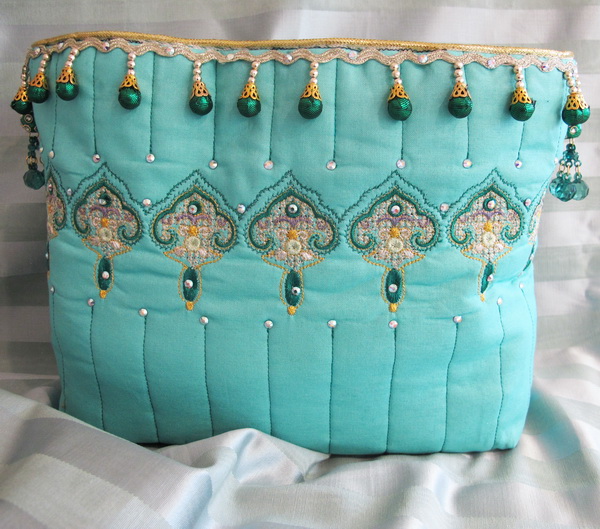
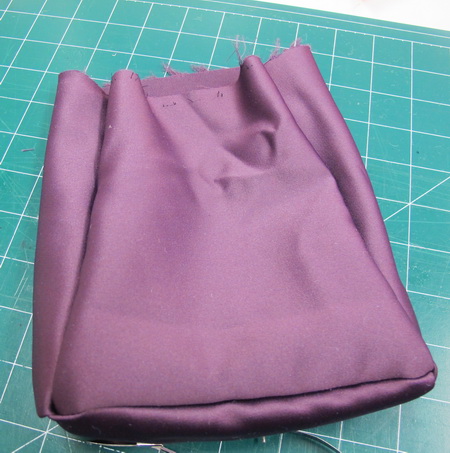
I like to make these for friends especially those who travel, these holders are great to throw odds and ends in rather than have all over the hotel room
Stitch out Harmony_09
The size of the holder is 35 wide x 28 cm length or 13.5 wide x 11 inches length
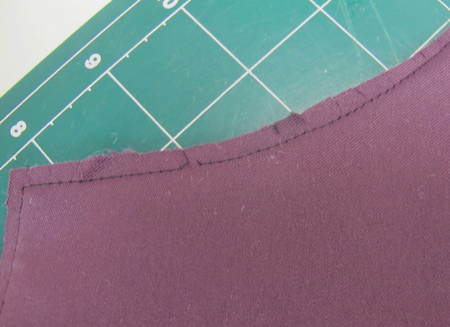
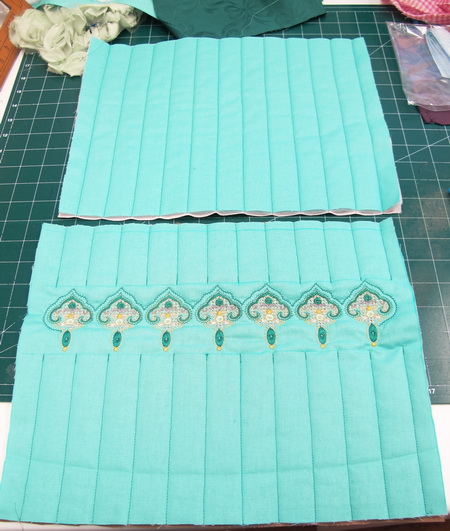
Stitch using a running stitch on your machine for both the front and back
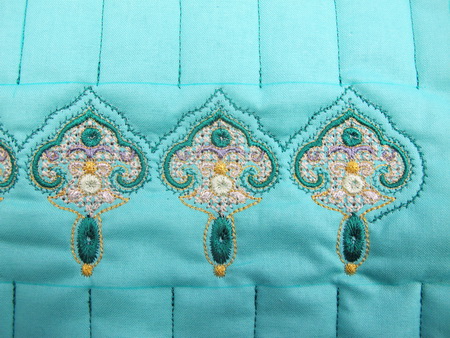
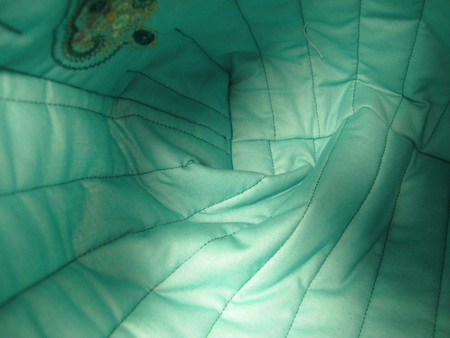
Photograph showing you a close up of the running stitch

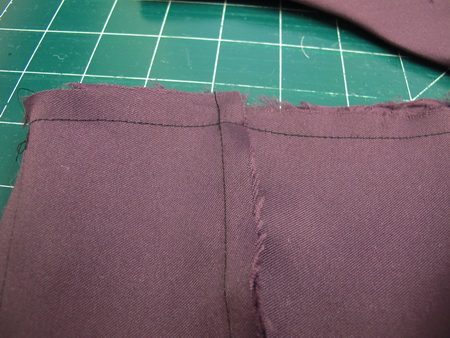
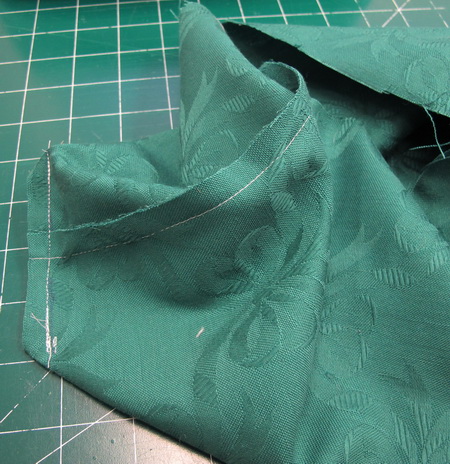
Mark on each side front and back 5 x 5 cm or 2 x 2 inches
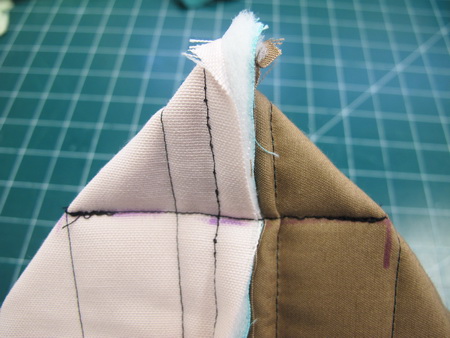
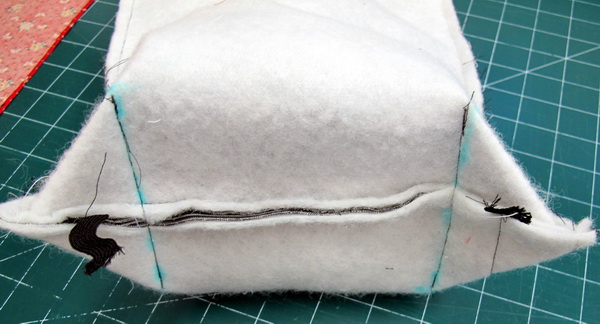
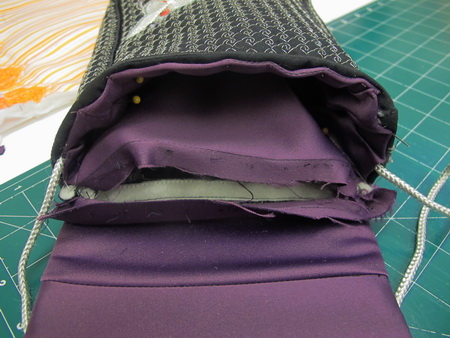
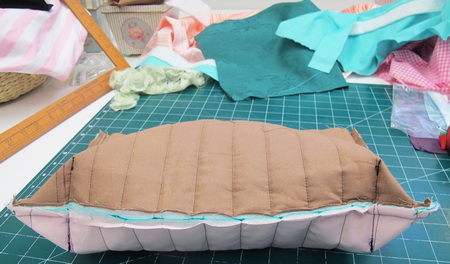
Before stitching match up the front and back seam, once you have matched the seams pin and then stitch across as you can see in the photo above
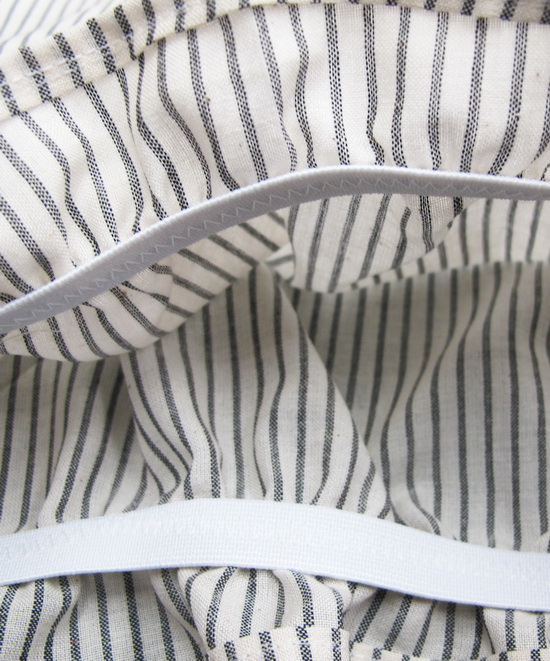
This photograph showing you the inside of the holder the two seams front and back joining
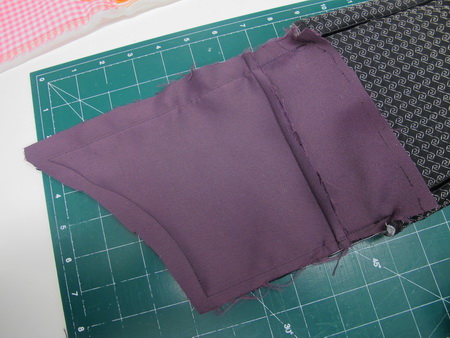
Cut what I call ears off so there will not be any bulk
Make the lining the same width and length
Follow instructions No. 3 to No. 6
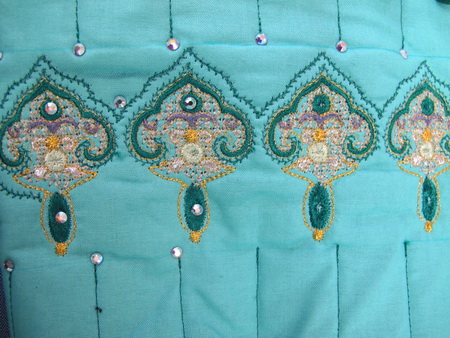
I added to the embroidery and the ends of the straight stitch those glue on crystals
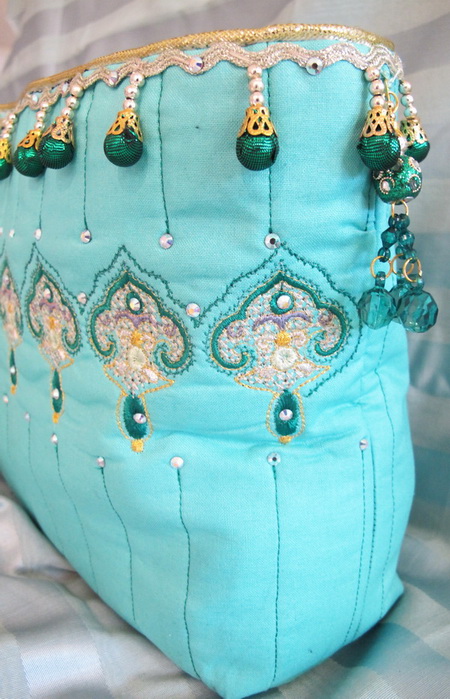
I had some gold cording and stitched it on the holder before I stitched the lining to the holder
While in India a couple of years ago I purchased many different types of haberdashery most were very Bollywood those, to give the holder that Bollywood look I added the dingle dangles, I think they look great on the holder, I stitched them on and then added a bit more glitz with the glued crystals that I had used on the rest of the holder
Machine Embroidery Designs
Latest Releases
Folklore Machine Embroidery Designs
Released on the 25th June 2019
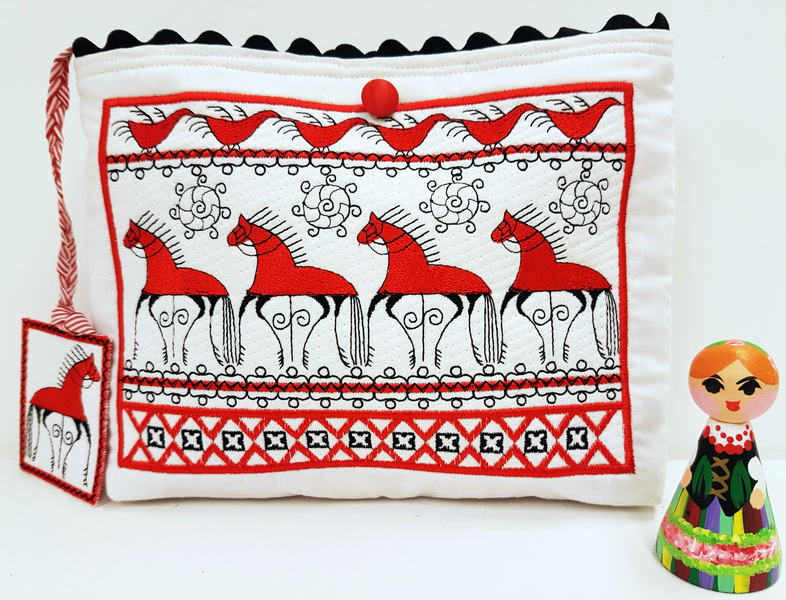
6 designs included in the Folklore machine embroidery design set.
The Folklore design is suitable for a 6 x 10 inch or 240mm x 150mm hoop.
The Folklore design is available in DST, EMB, EXP, HUS, JEF, PES, VIP, VP3 and XXX.
The colour chart is included in the design set
As I am now digitizing with Wilcom embroidery software (which is a commercial software) we are unable to convert files to ART format. Bernina embroidery machines will now need to purchase designs in EMB or EXP format. Sorry for the inconvenience.