Earthly Pleasures Placemat Cushion
|
Notions
|
|
| |
|
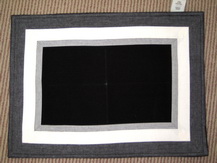 |
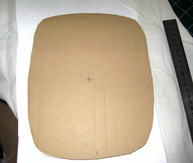
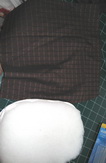
The photo to theleft shows the placemat which I purchased at “Country Road” Australia; you are able to purchase so many beautiful placemats in many stores through out the world today. Purchase two placemats the same
|
| |
|
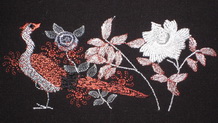 |
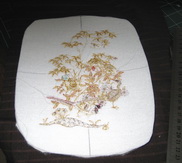
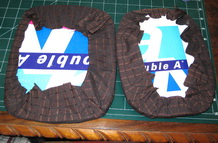
For the front of the placemat cushion, stitch on the placemat in the centre the following design “Earthly Pleasures_14” |
| |
|
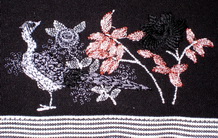 |
For the back of the placemat cushion, to the bottom right, stitch the following design “Earthly Pleasures_08” |
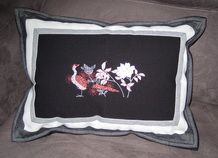 |
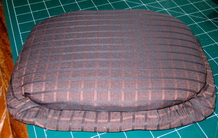
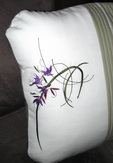
Front of the placemat cushion |
| |
|
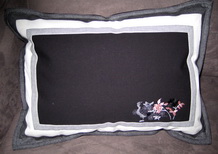 |
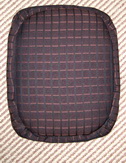
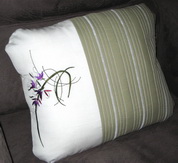
Back of the placemat cushion |
| |
|
|
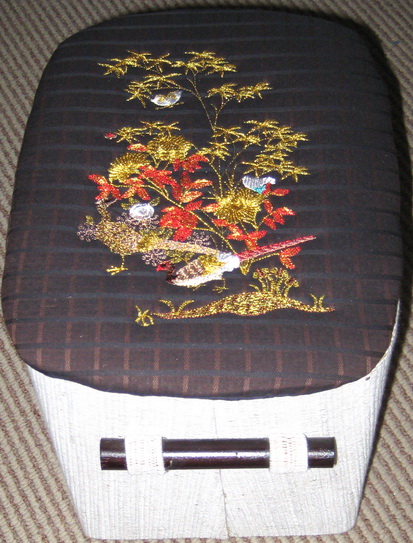
Earthly Pleasues Box
|
|
|
Notions:
|
|
| |
|
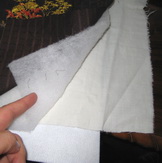 |
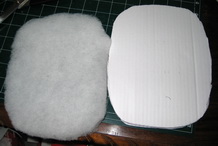
2 sheets of “Cut Away” stabilizer Cotton fabric (I have used old sheeting) Thick wadding Your choice of fabric to stitch Earthly Pleasures_01 |
| |
|
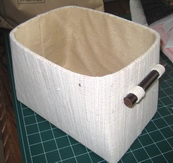 |
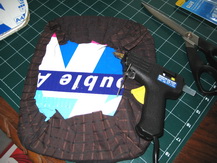
This box was covered in a linen type fabric when I purchased it |
| |
|
 |
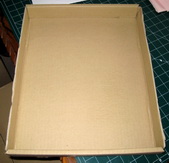
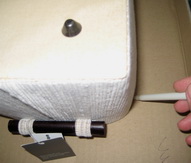
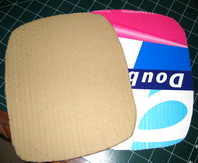
Cardboard from an old box |
| |
|
 |
Lay the top of the box over the cardboard and with a pen draw around the box |
| |
|
 |
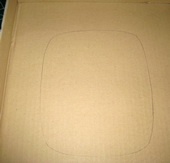
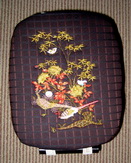
Template of the box top Cut the templatex |
| |
|
 |
Cut another piece of cardboard to make a thick lid and glue the two pieces of cardboard together |
| |
|
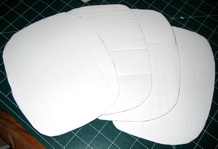 |
Cut 4 pieces of cardboard for the inside of the lid but make them to fit snug into the box, glue all four pieces of cardboard together |
| |
|
 |
Mark the centre of the lid on the cardboard |
| |
|
 |
Mark the centre of Earthly Pleasures_01 |
| |
|
 |
Line the embroidery with your cardboard lid |
| |
|
 |
Glue the embroidered fabric to the lid |
| |
|
 |
Inside of the lid 4 pieces of cardboard glued together Glue a piece of thick wadding to the 4 pieces of cardboard |
| |
|
 |
Cut a piece of fabric large enough to go over the inside lid |
| |
|
 |
Glue the fabric onto the inside lid |
| |
|
 |
Lid and inside of lid |
| |
|
 |
Glue the inside lid to the top lid |
 |
Top lid and inside lid |
| |
|
 |
Lid fits perfectly to the box |
| |
|
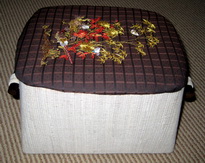 |
Another view of lid |
 |
Once again another view of the box and lid |
|
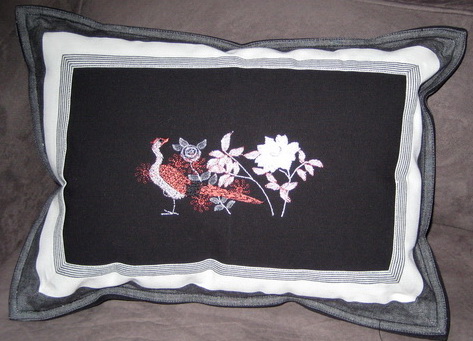
Earthly Pleasures Green Cushion
|
|
|
Notions:
|
|
| |
|
 |
Stitch out on a white fabric either Earthly Pleasures_10 or Earthly Pleasures_13 which ever hoop size you wish to use |
| |
|
 |
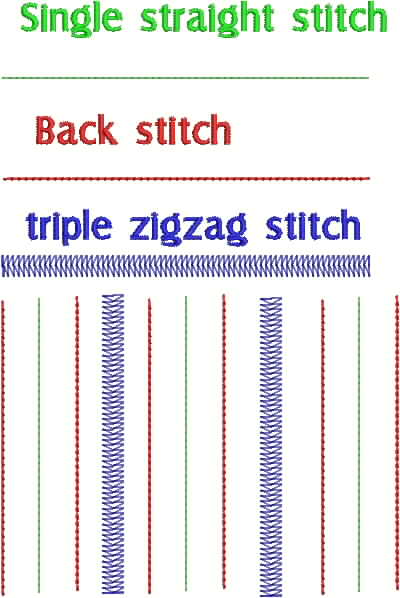
To make your plain green fabric blend with the Earthly pleasures design I suggest you try using the following decorative stitches from your sewing machine
I started by using the straight stitch first then using the edge guide stitched on either side of the straight stitch the back stitch, repeat all the way along the fabric then I stitched the triple zigzag stitch. This is a very simple but most effective way of combining both the Earthly pleasure design and your decorative stitches.
Once you have finished stitching the decorative stitches on the green fabric, stitch the white fabric and green fabric together and make the cushion. |
|
|
|
| |
|
 |
Joining the two fabrics together |
 |
All finished
This would look fabulous with another cushion just using the green fabric with the decorative stitches and another cushion with just the design on the same white fabric. Would make a stunning combination on your settee |
| |
|
|
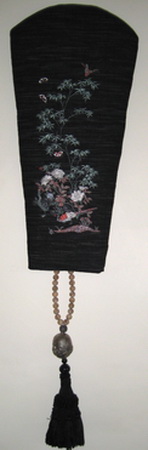
Earthly Pleasures Wall Hanging
|
|
|
Notions:
|
|
| |
|
 |
Hopping 2 layers of “Cut Away” and medium weight wadding, laying the black fabric over the hoop as shown in the photo |
| |
|
 |
Pinning the black fabric to the stabilizers and wadding |
| |
|
 |
Putting the needle over the point I had marked on the black fabric for Earthly pleasures_02
Lay the black fabric over the top of your hoop and position the needle over where you marked the design Pin your fabric down or stitch your template of the hoop Stitch out Earthly pleasures_02 |
| |
|
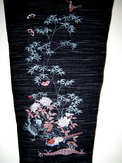 |
Both Earthly pleasures_01 and 02 combined |
| |
|
 |
Making a template for the wall hanging using tracing paper Design a template to what ever would best suite you; I am showing you how I went about doing this template. I drew it out first and then put a crease down the centre and was able to trace the other side to make a mirror image |
| |
|
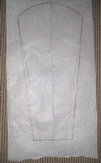 |
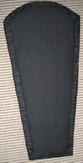
The template of the wall hanging on the tracing paper |
| |
|
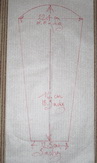 |
These are the exact measurement of the wall hanging in the photo |
| |
|
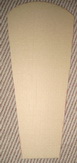 |
Cut out cardboard using your tracing paper template |
| |
|
 |
Lay over the cardboard, medium weight wadding and glue to the cardboard Lay the black fabric over the wadding and glue the black fabric to the back |
| |
|
 |
Cut out another cardboard template but making it smaller |
| |
|
 |
Lay over the cardboard another piece of wadding and glue, then lie over the wadding, black fabric and glue it down Glue both cardboards together as shown in the photo |
| |
|
 |
Showing both cardboards glued together |
| |
|
 |
Using venation blind cording I stapled both ends down to hang the wall hanging |
| |
|
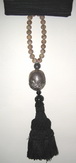 |
I stitched this beautiful tassel onto the back of the wall hanging. I purchased this tassel when in Maui about 4 years ago, since then I have seen so many fabulous tassels in many stores these days |
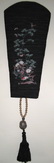 |
I think this wall hanging is so beautiful, I just love it!!! |